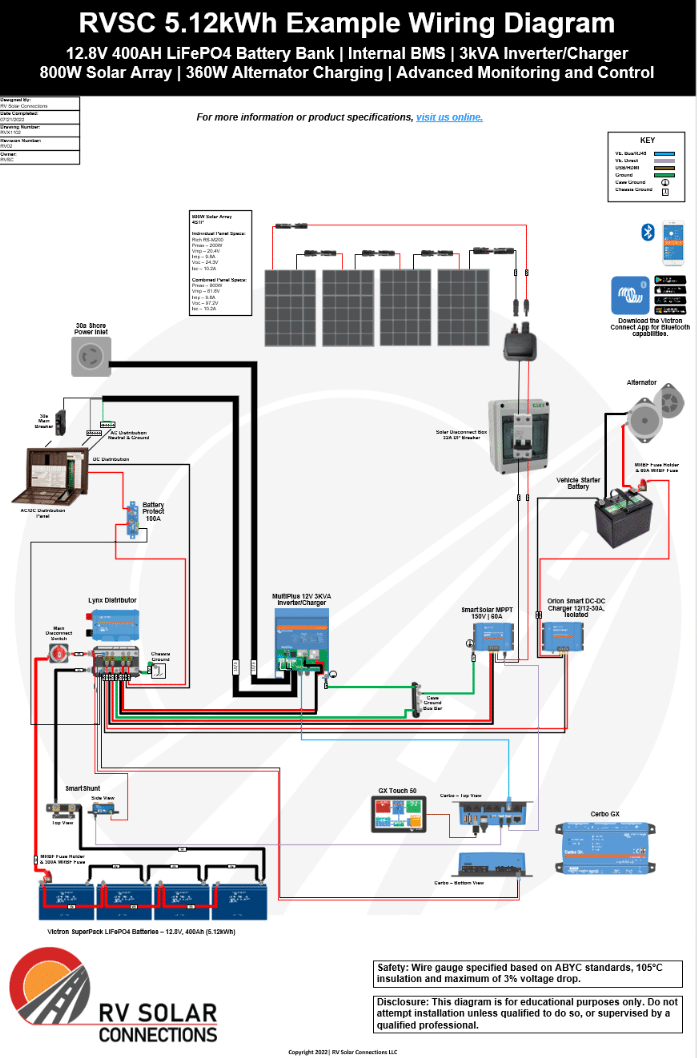
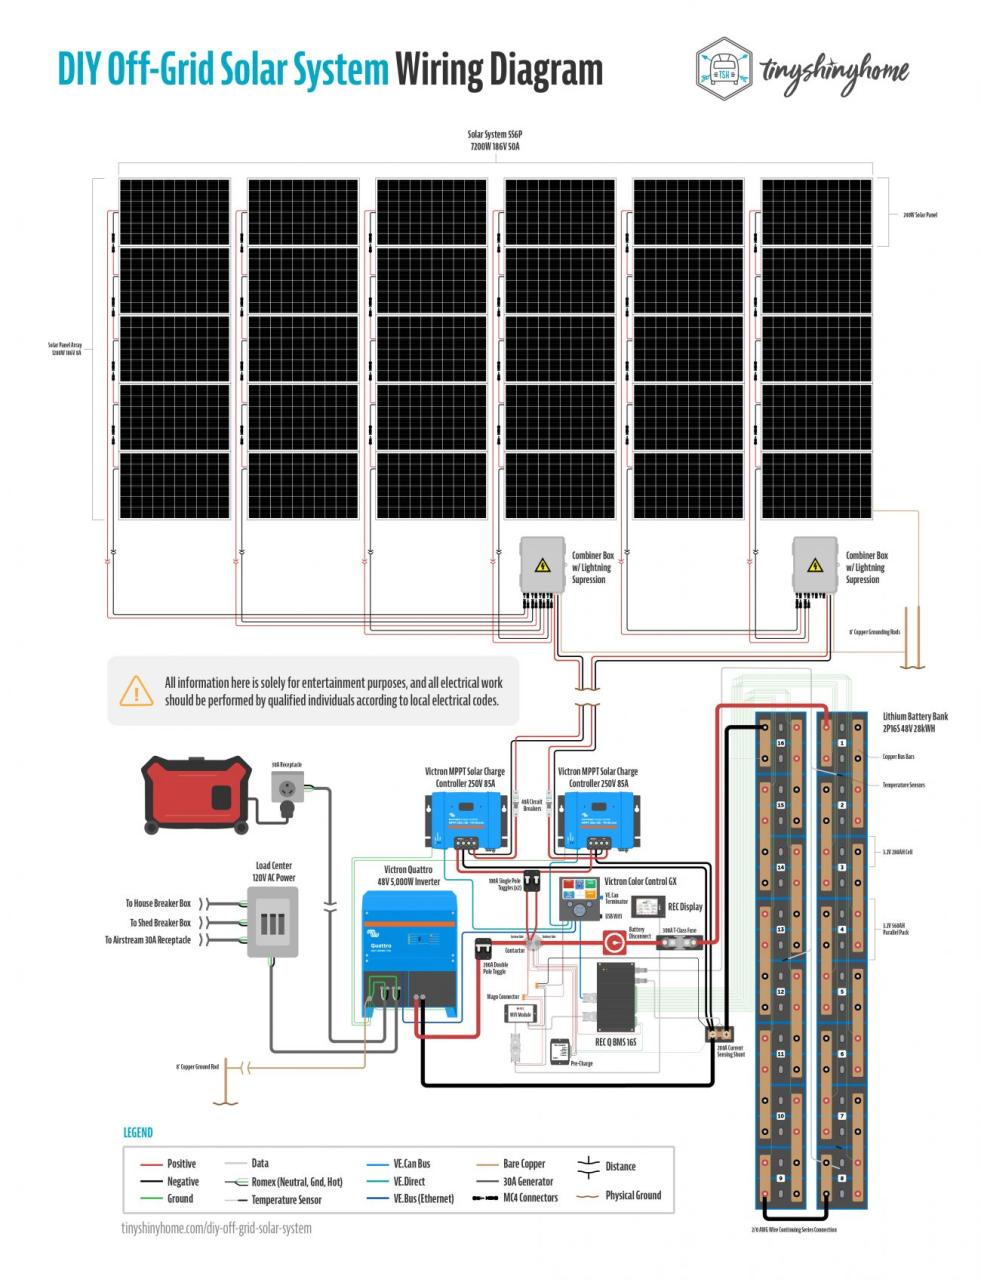
“Wiring solar panels with MPPT controller and battery storage
A well-designed solar power system with Maximum Power Point Tracking (MPPT) controller and battery storage can significantly reduce energy costs and provide a reliable source of electricity. In this article, we will delve into the details of wiring solar panels with an MPPT controller and battery storage, and explore the benefits and best practices of such a system.
Introduction to Solar Power Systems
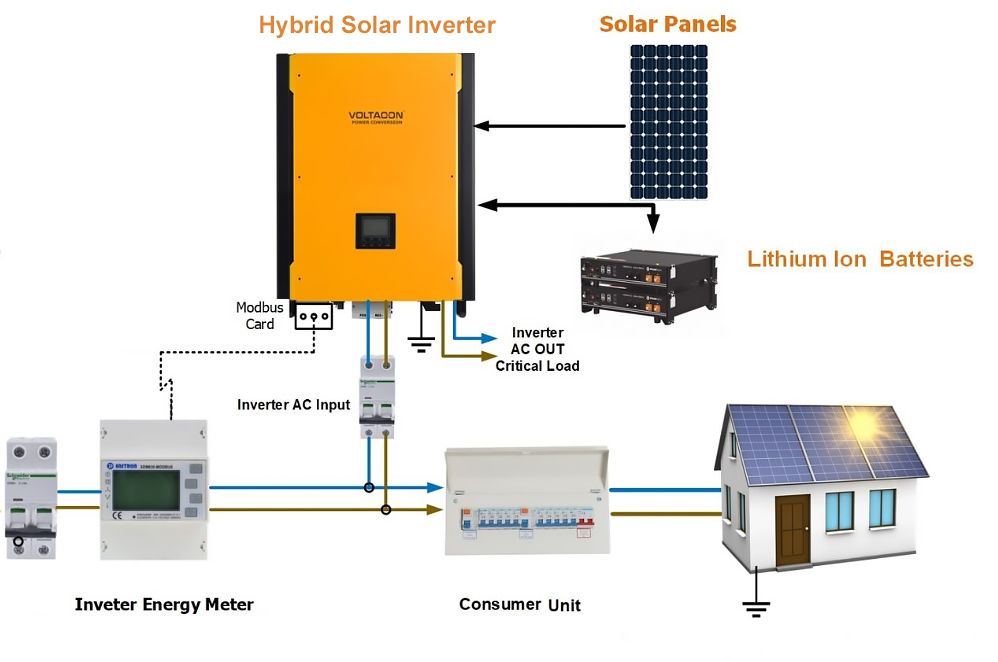
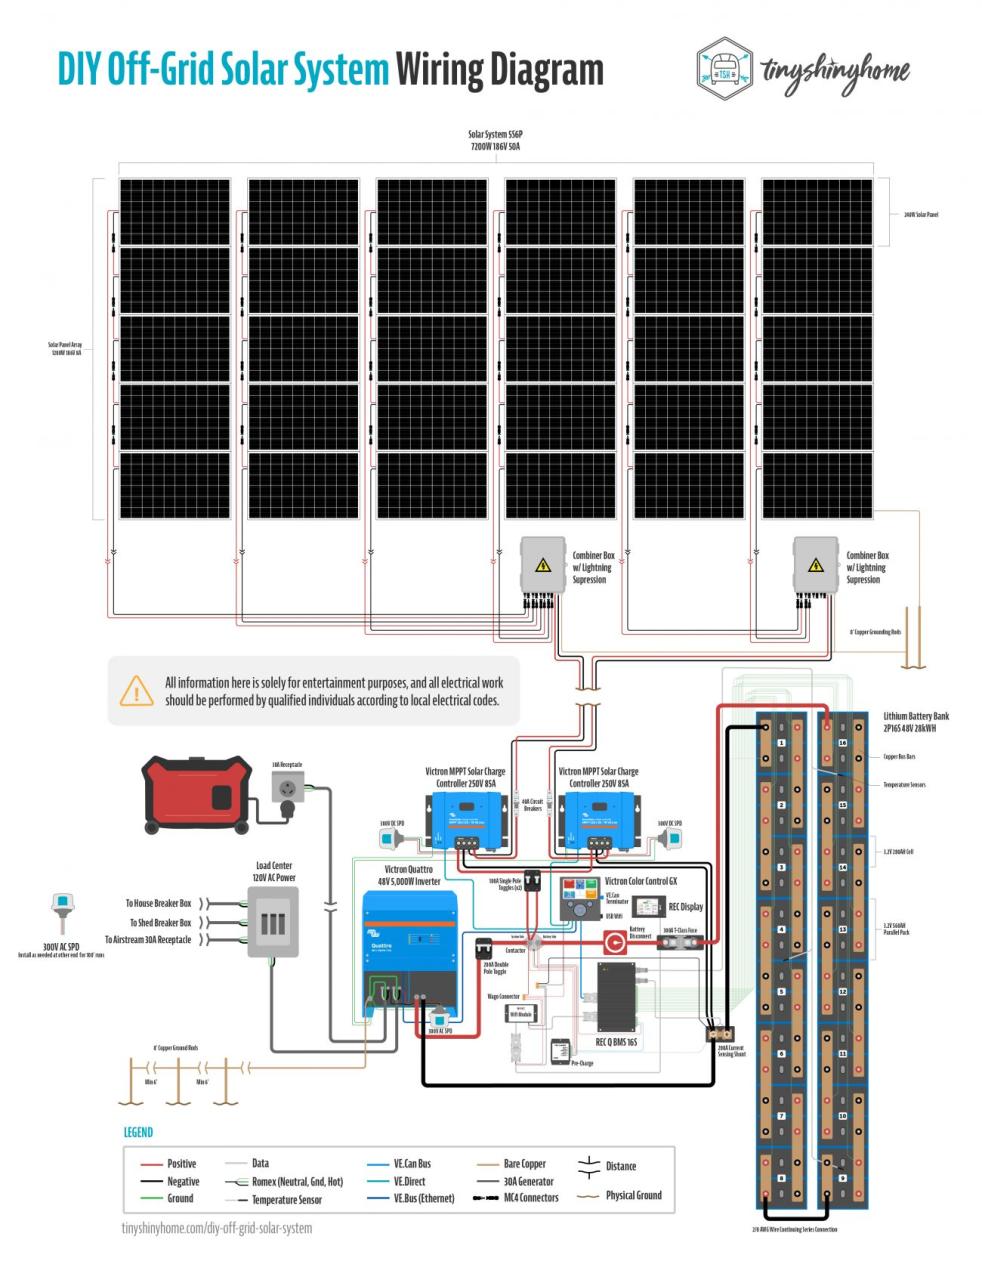
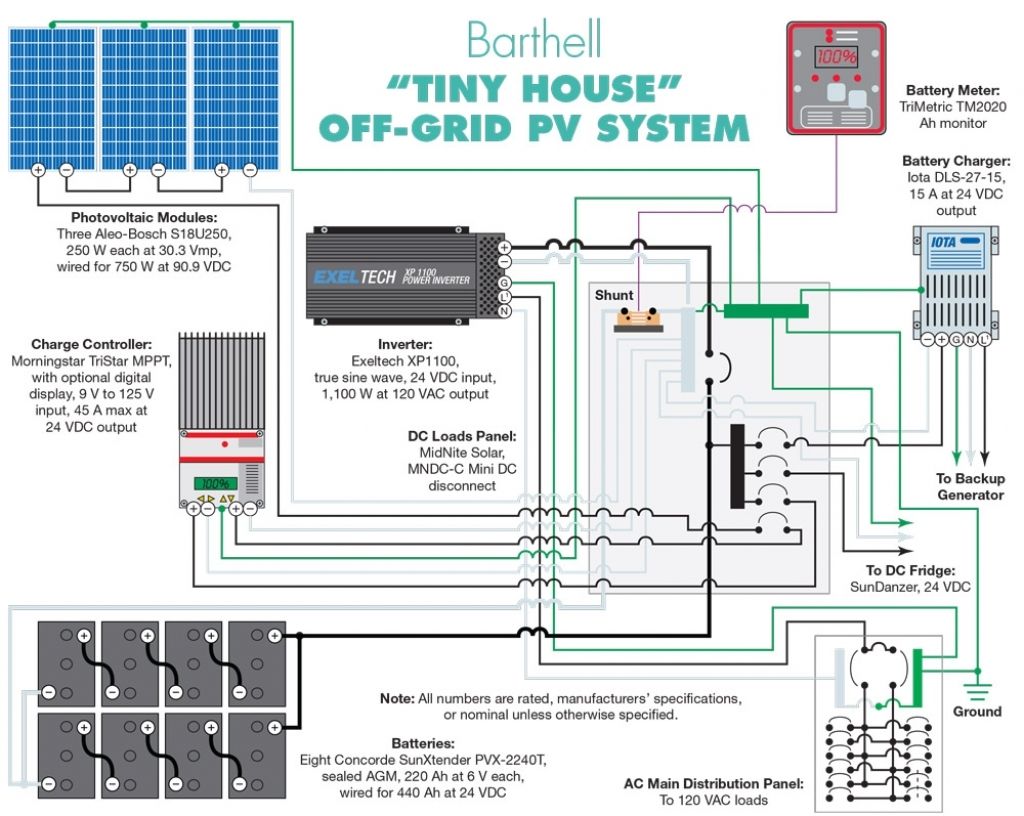
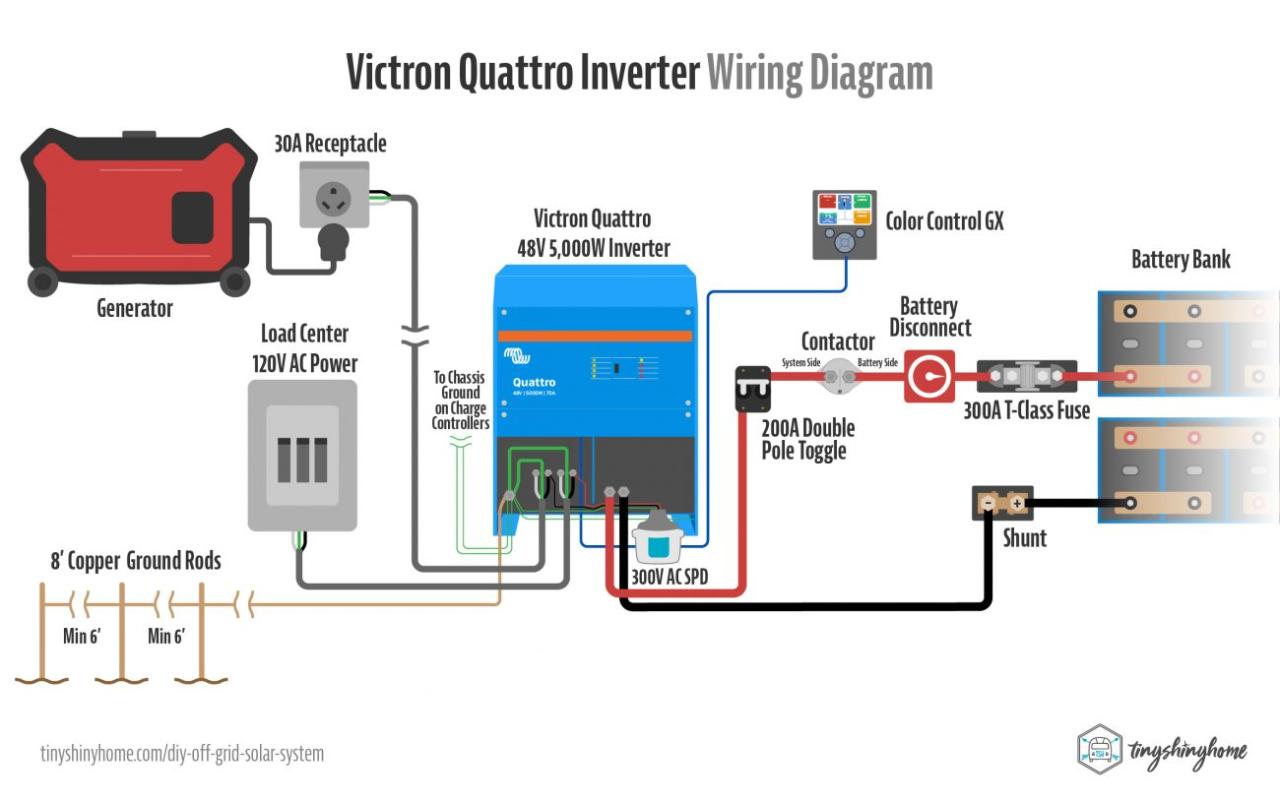
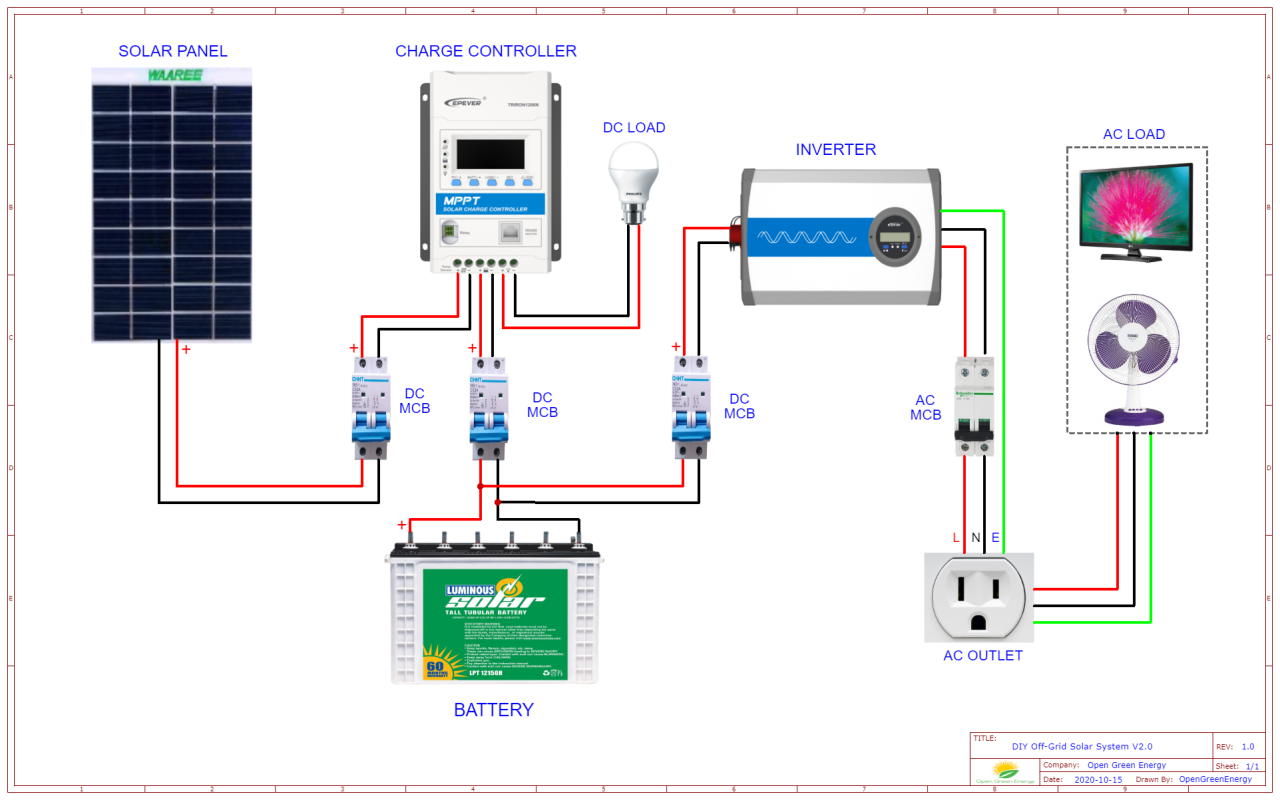
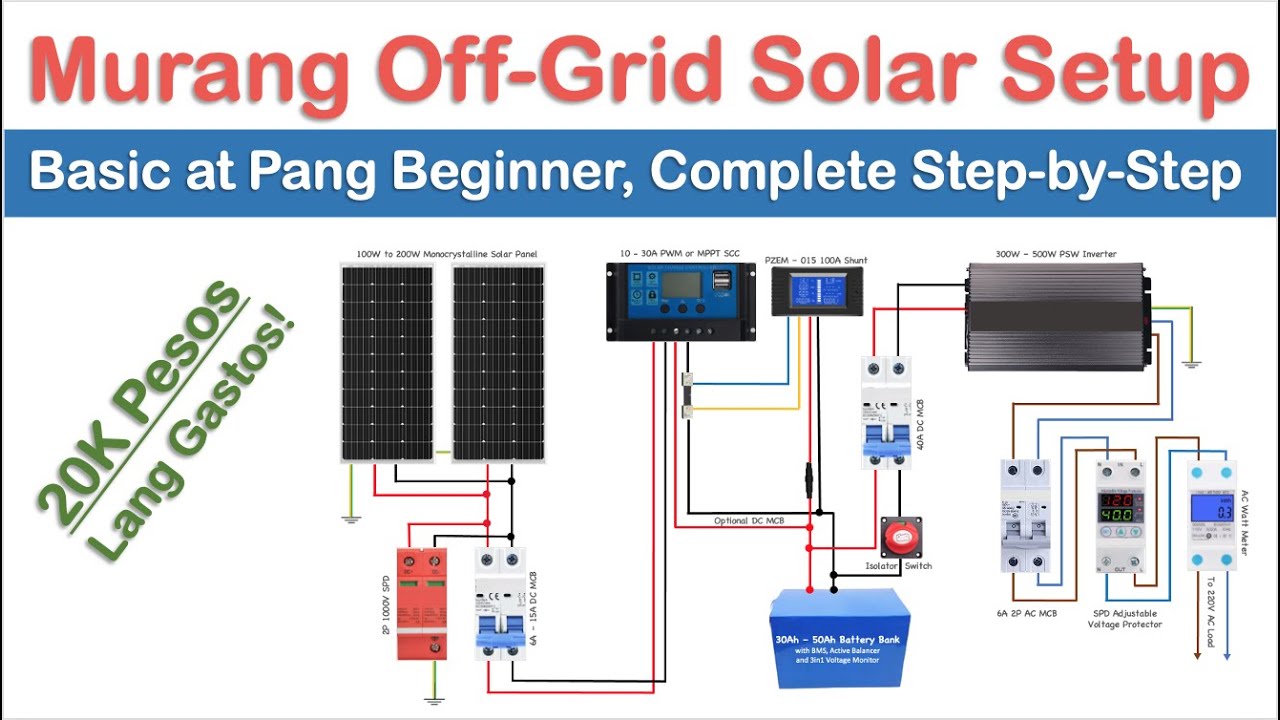
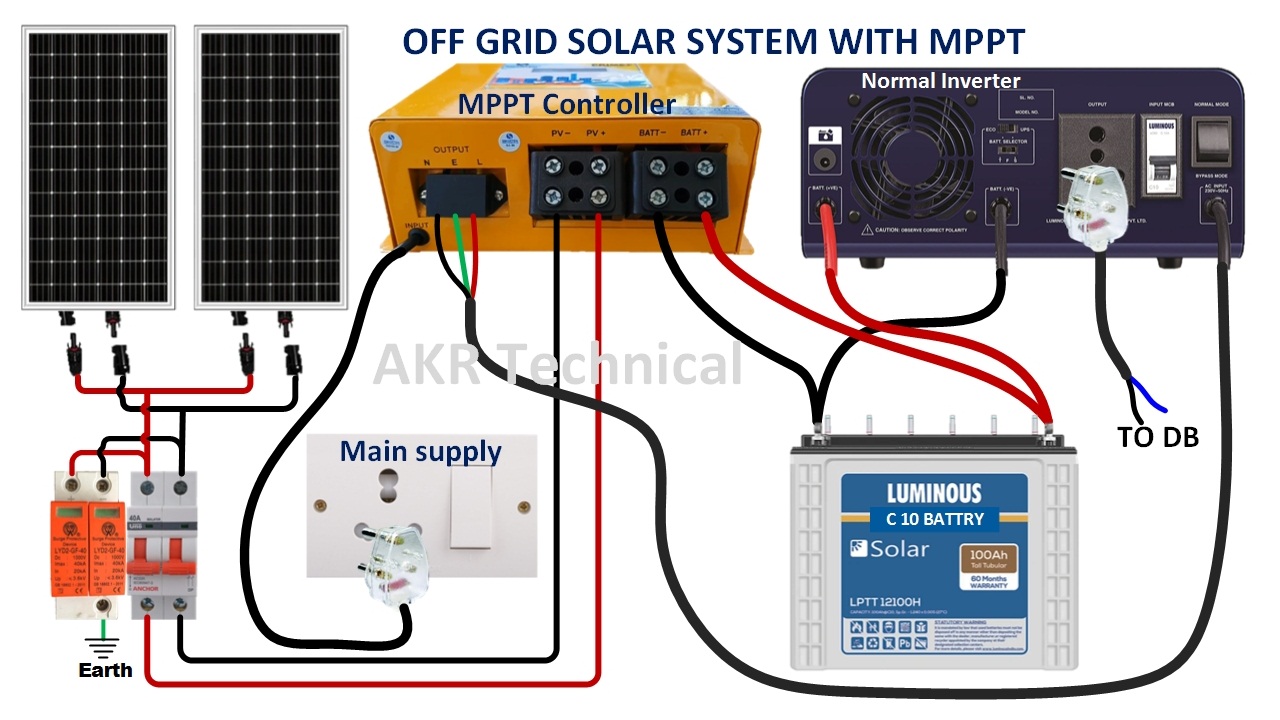
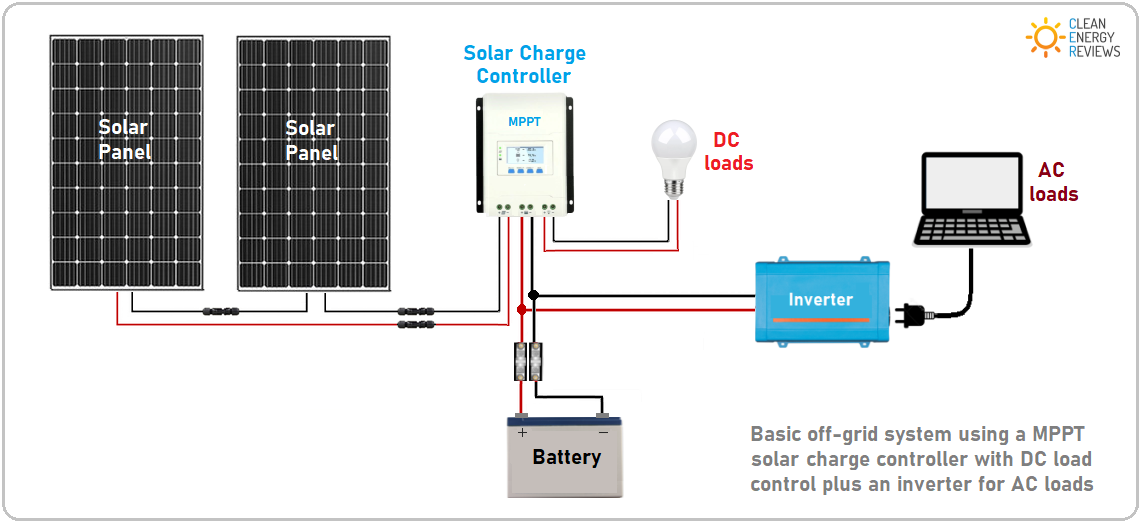
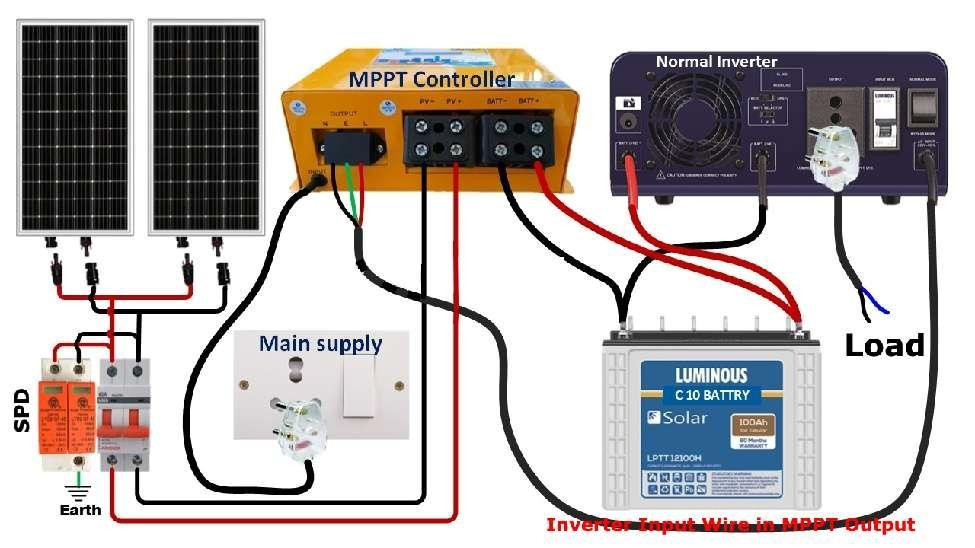
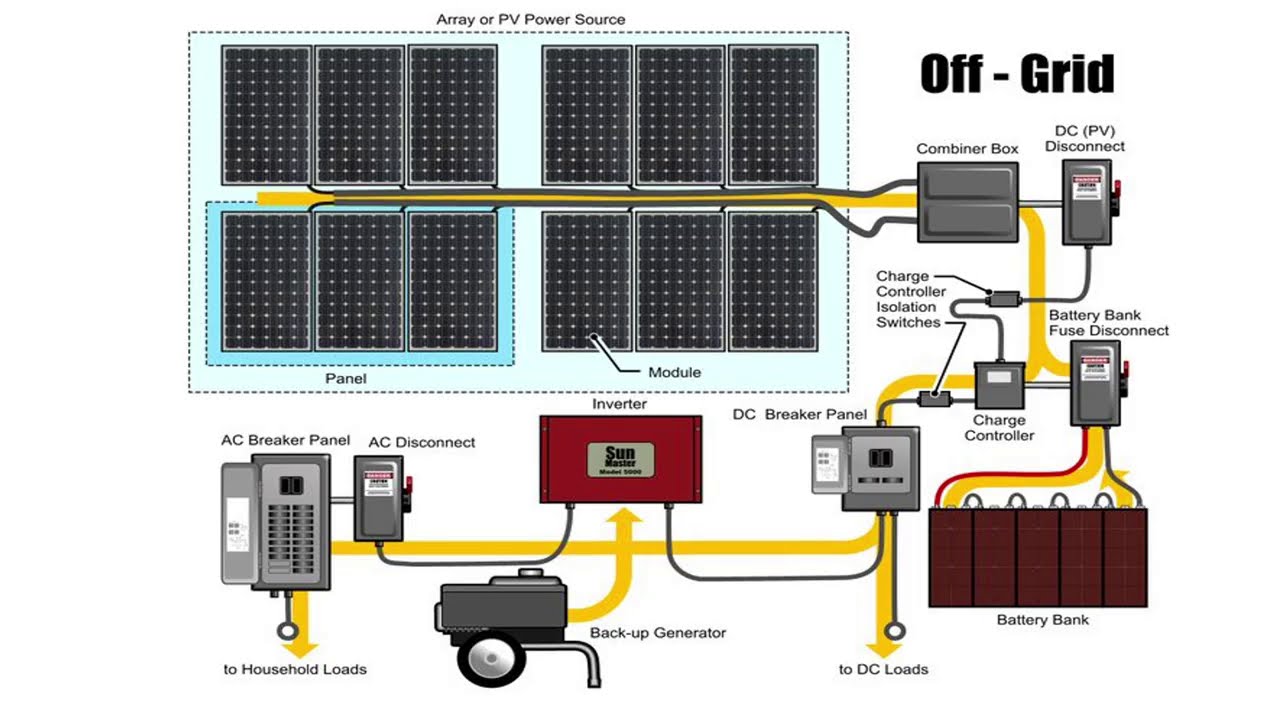
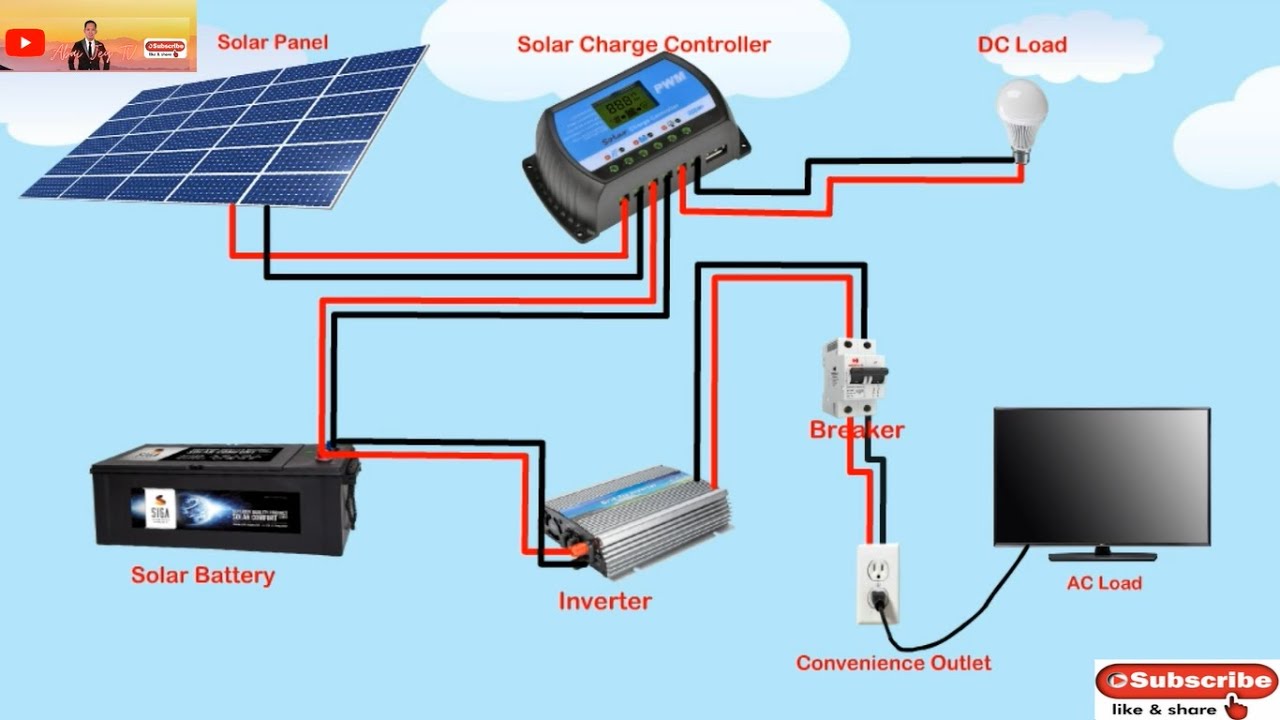
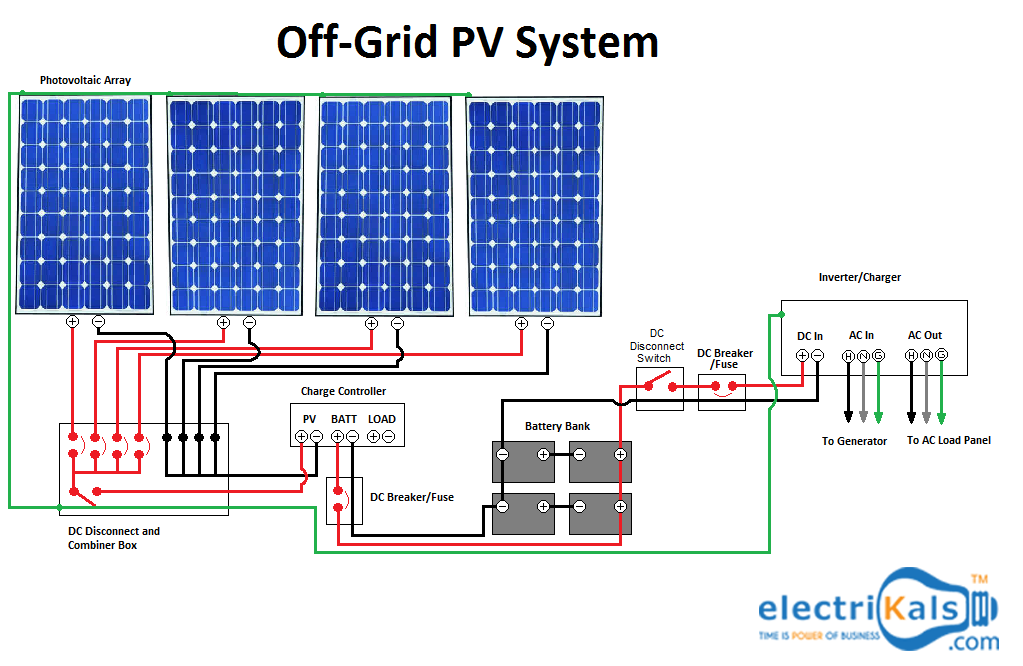
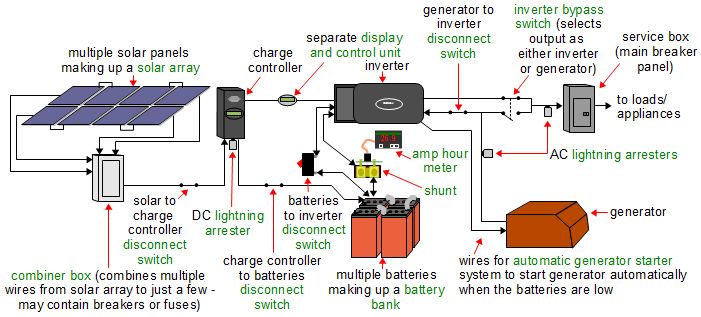
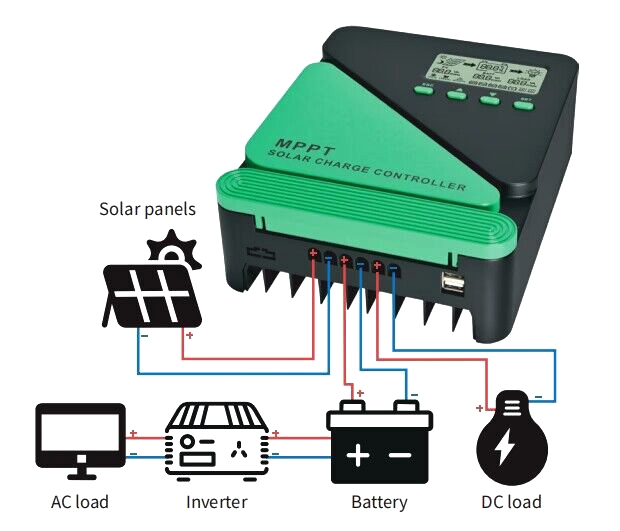
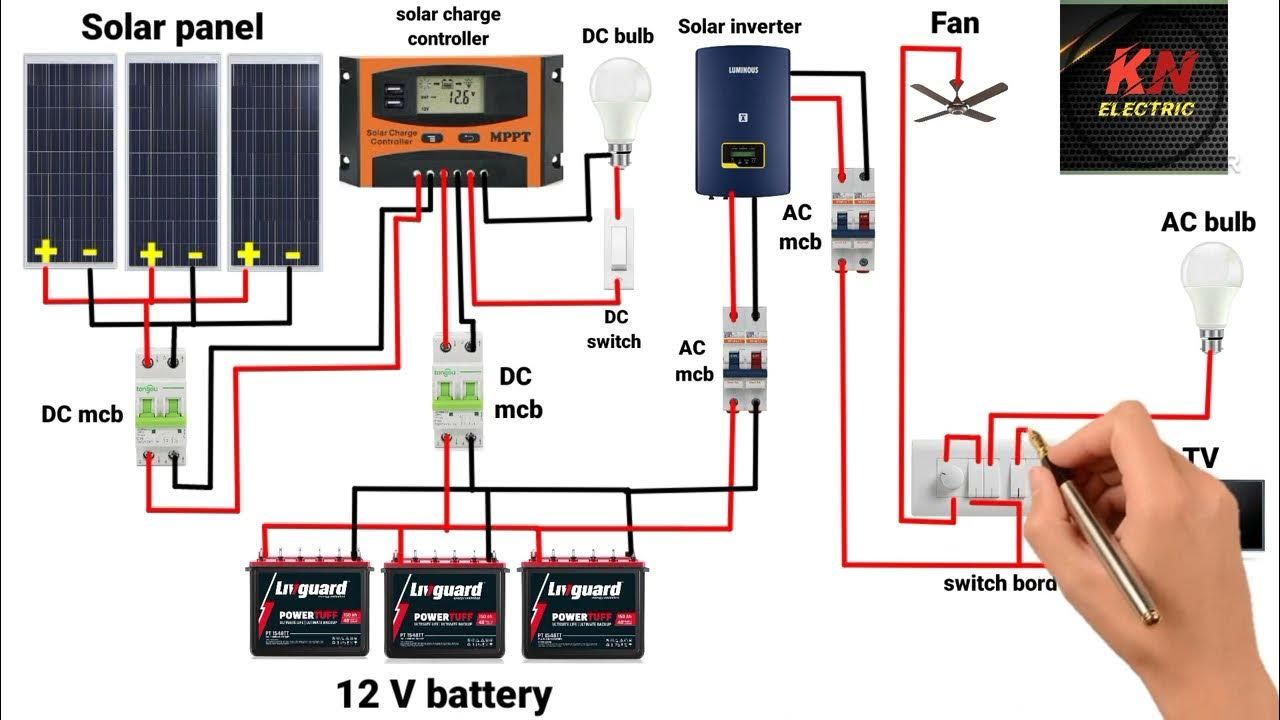
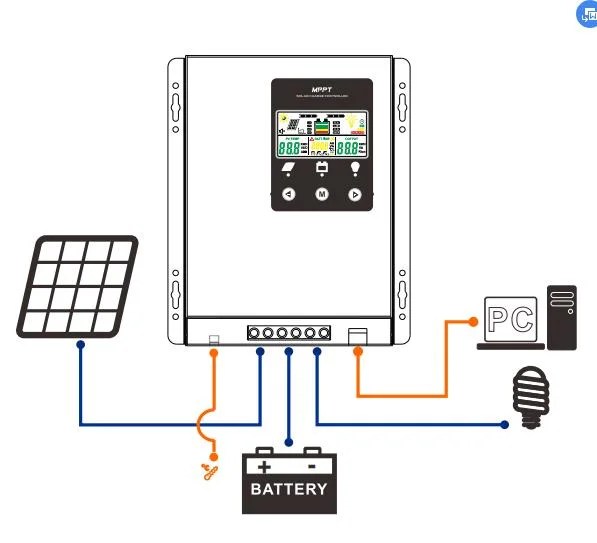
A solar power system consists of solar panels, a charge controller, a battery bank, and an inverter. The solar panels convert sunlight into DC electricity, which is then sent to the charge controller. The charge controller regulates the flow of energy from the solar panels to the battery bank, ensuring that the batteries are not overcharged or undercharged. The battery bank stores excess energy generated by the solar panels during the day for use during the night or on cloudy days. The inverter converts the DC electricity stored in the batteries to AC electricity, which can be used to power appliances and equipment.
Maximum Power Point Tracking (MPPT) Controller
A Maximum Power Point Tracking (MPPT) controller is a critical component of a solar power system. Its primary function is to optimize energy harvest from the solar panels by tracking the maximum power point (MPP) of the solar array. The MPP is the point at which the solar array produces the maximum power, taking into account the voltage and current output of the solar panels. The MPPT controller continuously monitors the voltage and current output of the solar array and adjusts the operating point of the solar panels to ensure maximum energy production.
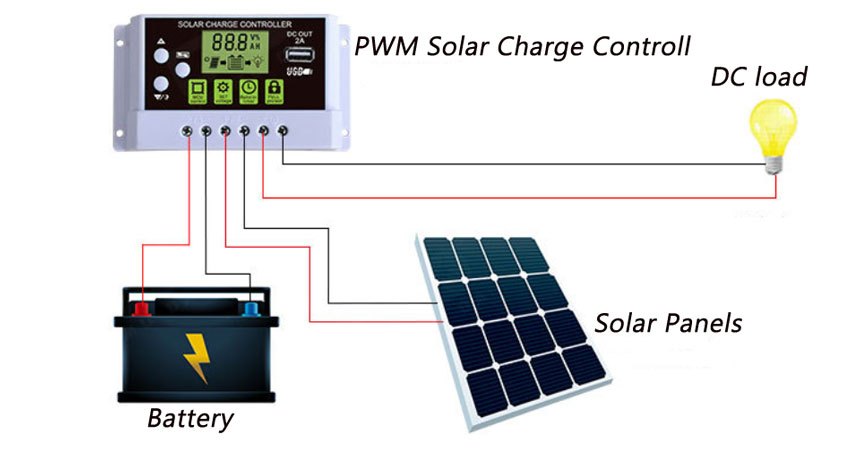
MPPT controllers offer several advantages over traditional pulse width modulation (PWM) controllers, including:
- Higher Efficiency: MPPT controllers can increase energy production by up to 30% compared to PWM controllers.
- Improved Charging: MPPT controllers can charge batteries faster and more efficiently, reducing charging time and increasing battery lifespan.
- Flexibility: MPPT controllers can handle a wide range of solar panel configurations and battery types.
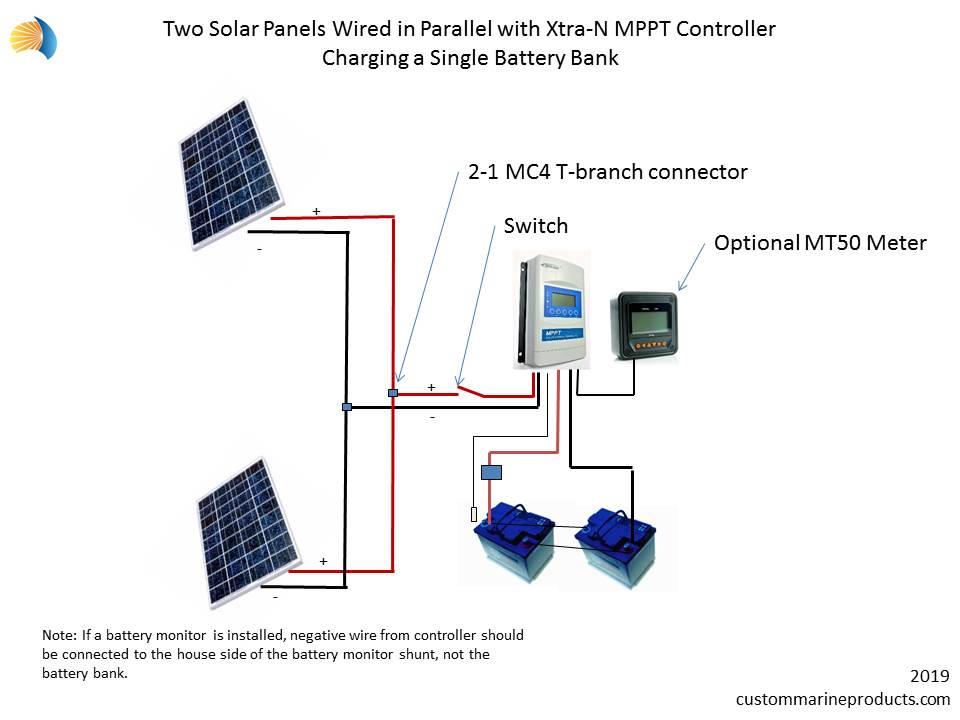
Wiring Solar Panels with MPPT Controller
When wiring solar panels with an MPPT controller, it is essential to follow proper wiring and configuration guidelines to ensure safe and efficient operation. Here are some steps to follow:
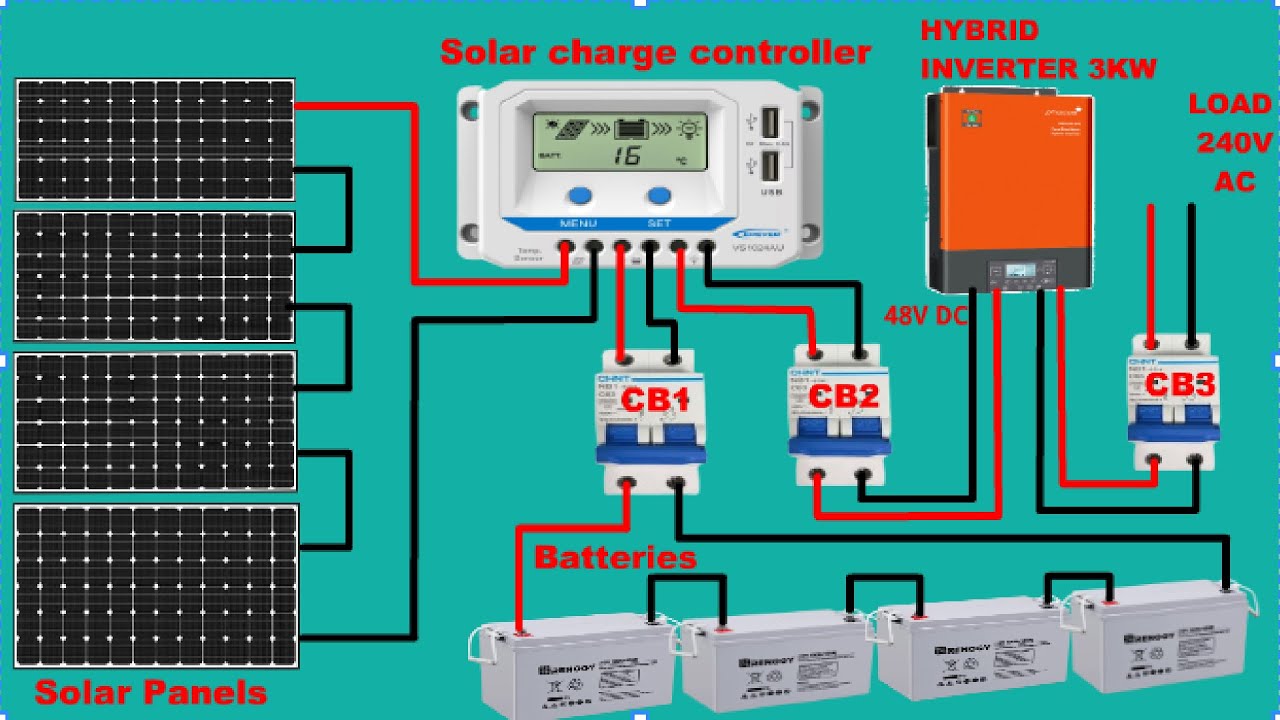
- Determine the Solar Panel Configuration: Determine the number of solar panels to be connected in series and parallel to achieve the desired voltage and current output.
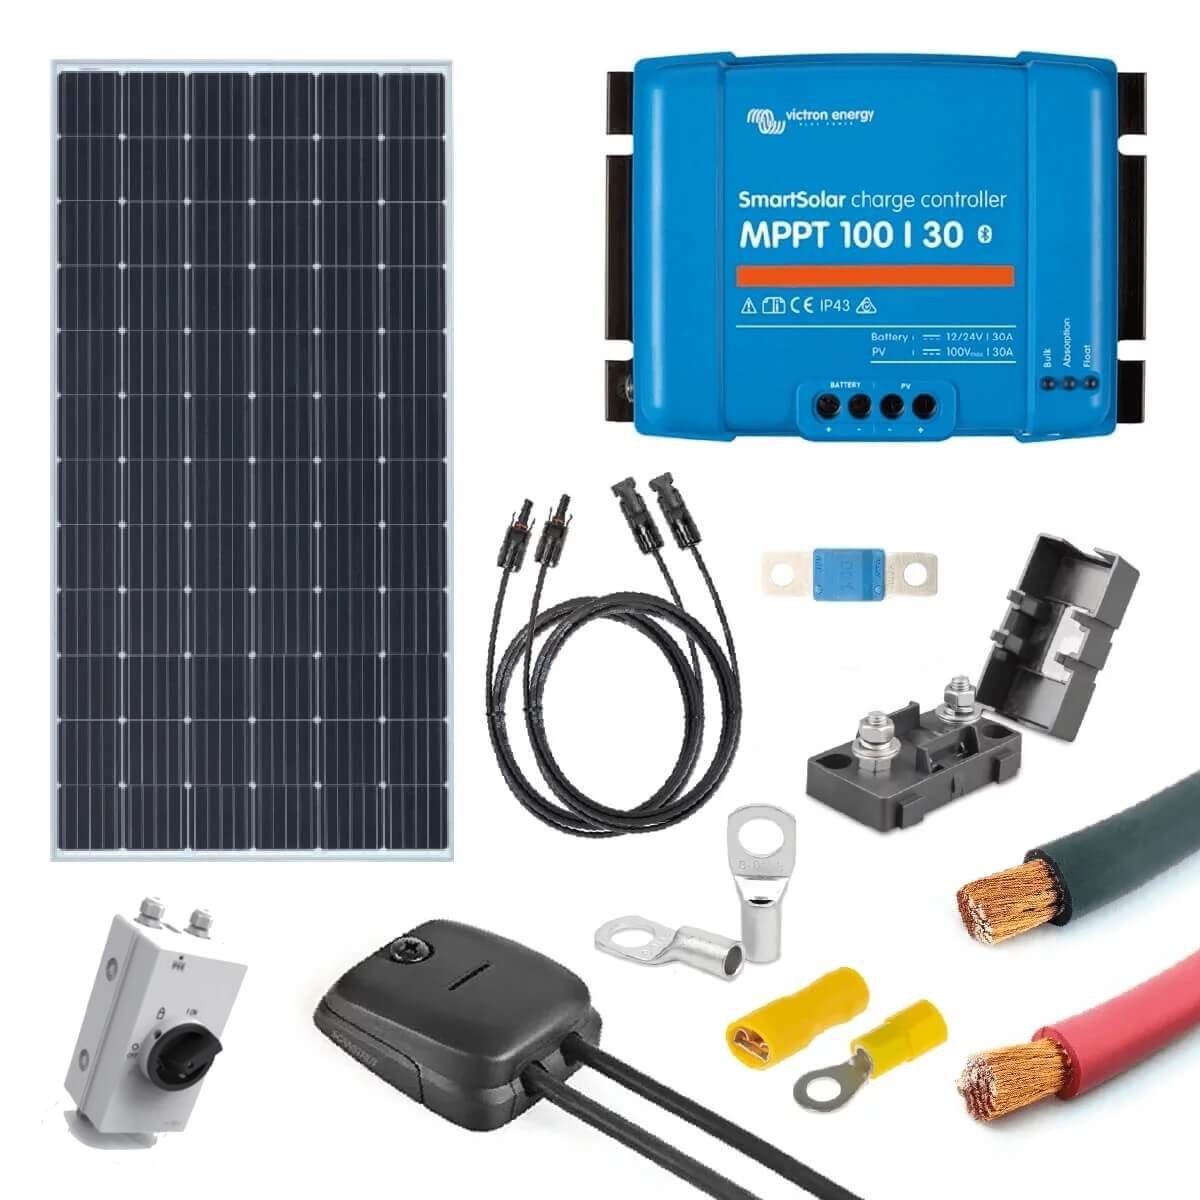
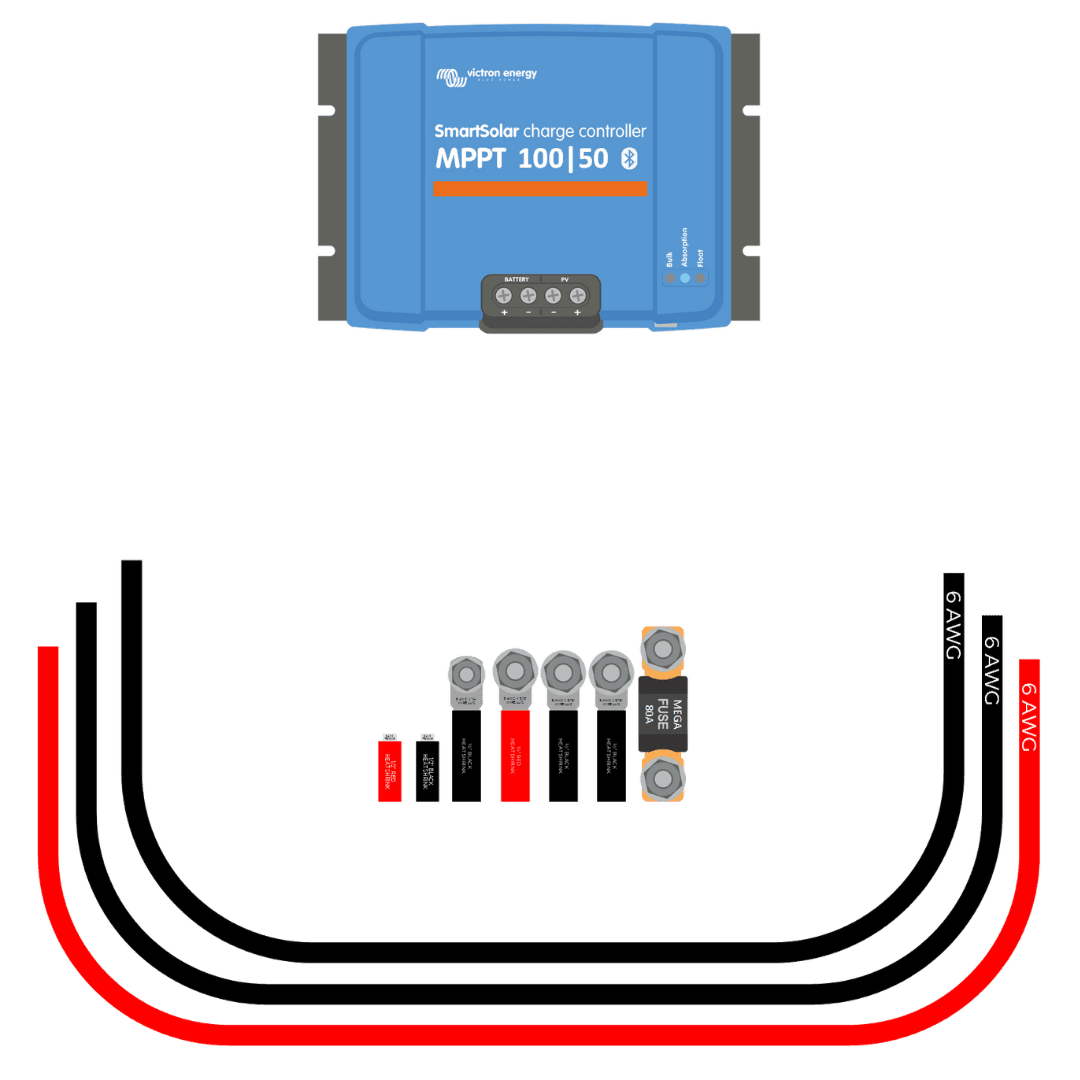
- Choose the Correct Wire Size: Choose wire sizes that can handle the maximum current output of the solar panels and the MPPT controller.
- Connect Solar Panels in Series: Connect solar panels in series to achieve the desired voltage output. Ensure that the voltage output of the solar panels matches the input voltage range of the MPPT controller.
- Connect Solar Panels in Parallel: Connect solar panels in parallel to increase the current output. Ensure that the current output of the solar panels does not exceed the maximum current rating of the MPPT controller.
- Connect the MPPT Controller: Connect the MPPT controller to the solar panels and the battery bank. Ensure that the polarity of the connections is correct, and the wiring is secure and protected from the elements.
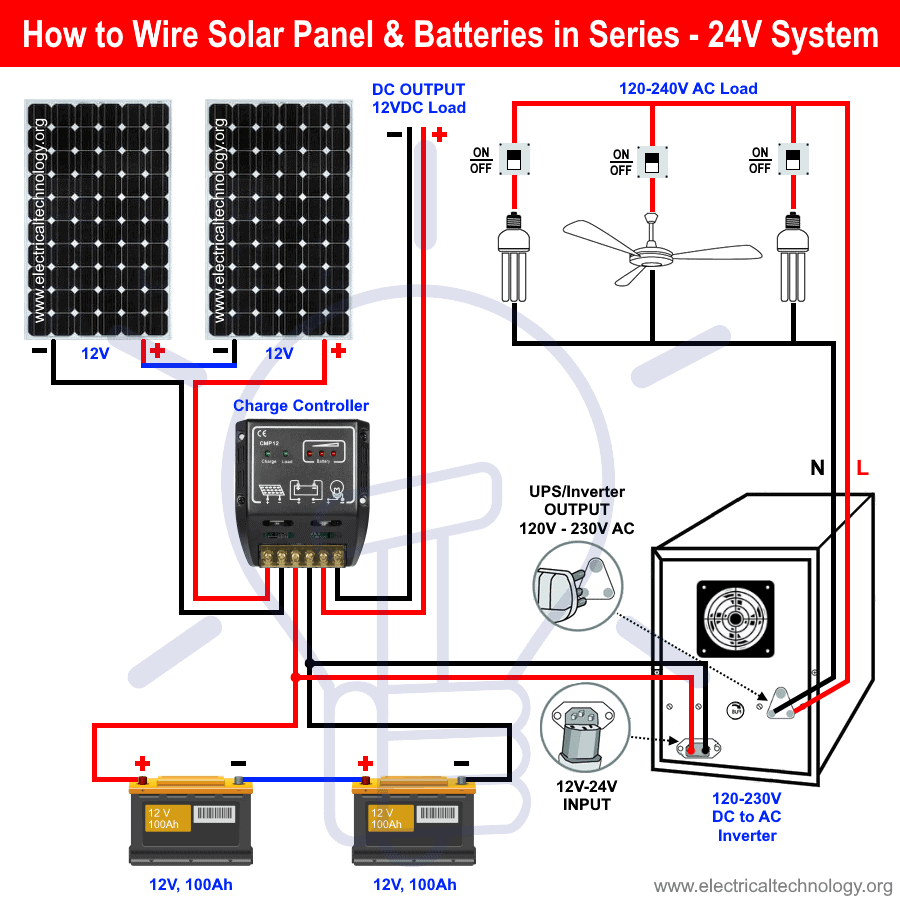
Battery Storage
Battery storage is a critical component of a solar power system, allowing excess energy generated by the solar panels to be stored for later use. Here are some factors to consider when selecting a battery bank:
- Depth of Discharge (DOD): Choose batteries with a high DOD to maximize energy storage capacity.
- Cycle Life: Choose batteries with a high cycle life to ensure long-term reliability and performance.
- Self-Discharge Rate: Choose batteries with a low self-discharge rate to minimize energy loss during storage.
- Battery Type: Choose between lead-acid, lithium-ion, or other battery types based on cost, performance, and environmental factors.
Wiring the Battery Bank
When wiring the battery bank, it is essential to follow proper wiring and configuration guidelines to ensure safe and efficient operation. Here are some steps to follow:
- Determine the Battery Configuration: Determine the number of batteries to be connected in series and parallel to achieve the desired voltage and capacity.
- Choose the Correct Wire Size: Choose wire sizes that can handle the maximum current output of the battery bank and the MPPT controller.
- Connect Batteries in Series: Connect batteries in series to achieve the desired voltage output. Ensure that the voltage output of the batteries matches the input voltage range of the MPPT controller.
- Connect Batteries in Parallel: Connect batteries in parallel to increase the capacity. Ensure that the capacity of the batteries does not exceed the maximum capacity rating of the MPPT controller.
- Connect the MPPT Controller: Connect the MPPT controller to the battery bank and the solar panels. Ensure that the polarity of the connections is correct, and the wiring is secure and protected from the elements.
Best Practices for Wiring Solar Panels with MPPT Controller and Battery Storage
Here are some best practices to follow when wiring solar panels with an MPPT controller and battery storage:
- Follow Manufacturer Instructions: Follow the manufacturer instructions for the solar panels, MPPT controller, and battery bank to ensure proper wiring and configuration.
- Use Proper Wire Sizes: Use wire sizes that can handle the maximum current output of the solar panels and the MPPT controller.
- Ensure Proper Polarity: Ensure that the polarity of the connections is correct to prevent damage to the equipment and ensure safe operation.
- Protect the Wiring: Protect the wiring from the elements and physical damage to ensure long-term reliability and performance.
- Monitor the System: Monitor the system performance regularly to ensure that it is operating efficiently and effectively.
Conclusion
Wiring solar panels with an MPPT controller and battery storage requires careful planning and attention to detail to ensure safe and efficient operation. By following proper wiring and configuration guidelines, and selecting the right equipment, you can create a reliable and efficient solar power system that meets your energy needs. Remember to follow manufacturer instructions, use proper wire sizes, ensure proper polarity, protect the wiring, and monitor the system performance regularly to ensure long-term reliability and performance. With the right design and installation, a solar power system with MPPT controller and battery storage can provide a reliable source of energy for years to come.